Micrometer - Parts Working, Principle Types, Applications
Hello mechons, in this post we are going to see about the Measuring Device named "MICROMETER". Here, We will explain you about what is micrometer, types of micrometer , and the types of micrometer.
{tocify}=$title{contents}
First let's begin with a question
What is Micrometer?
The Micrometer is a device used for getting the exact measurement of objects. The other names micrometer are screw gauge, it is also called micrometer caliper since it is used for calibration purposes too. It is widely used by engineers to measure the exact dimensions of the objects which is to be measured.
In other words, the micrometer is a handy measuring device used mainly by engineers to measure the exact dimensions of the objects.
Parts of a Micrometer
What are the parts of Micrometer?
A basic Micrometer consists the following
parts
- Frame
- Anvil
- Spindle
- Lock Nut
- Spindle
- Sleeve
- Thimble
- Ratchet
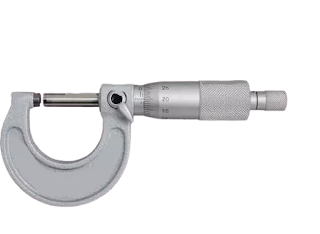
The frame of the micrometer will be in Shape of the English Alphabet 'C'. It is a rigid part that holds the object to be measured using the micrometer. The main purpose of the frame is to provide sufficient holding power between anvil and the spindle for holding the object. The anvil is stationary one, whereas the spindle is the movable one. The size of the frame depends on the measuring range.
The zero adjusting screw is a type of a screw which is located at the backside of the anvil. It is used to rectify the zero error of the micrometer before doing the measurement or calibration processes.
The anvil is a small fixed stationary part of a micrometer positioned at one end of the frame. It is provided for holding the object between it and spindle in frame. Since it is a fixed part, it provides rigidity and gripness for the holding of objects.
The spindle is the longest part of the micrometer. It is a movable part attached with the ratchet. We can rotate the spindle both in Clockwise and Counter-Clockwise. By using the ratchet we can adjust the position of the spindle to tightly hold the object which is to be measured.
The locknut acts as a stationary nut and control the rotation of the spindle. It is quater turn nut. Its purpose of providing is the spindle won't move after we locker the lock nut.
It is a cylindrical shaped part which placed on the micrometer spindle. It is the main scale of the micrometer. The rotation of the thimble takes place around the sleeve and the spindle. Since, the main scale is carved in the sleeve. The function of the sleeve is to indicate the reading of the micrometer.
The thimble is mounted on the spindle of the micrometer. A fractional scale is craved on the surface of the thimble for the measurement of precision values. As mentioned as earlier, the rotation of the thimble takes place around the sleeve and the spindle.
The knurled grip surface used on the micrometer for rotating the spindle in the desired direction of the user is called as ratchet. It is provided to prevent the over tightening of the object to be measured and also to distribute the pressure equally to the surface of the object in each measurement process.
Principle of micrometer
Micrometer works based on the screw and nut principle. The screw is attached to the thimble. The circumference of the thimble is divided in to equal parts based on the graduations of the micrometer either in inches or in millimeter. The principle of screw and nut states that when a screw rotates a nut by a revolution, then the axial movement of the nut is equal to the pitch of the thread of a screw.
Let's Assume that, you are a pitch of screw in mm, then each rotation advances by the screw will be equal to the internal thread distance by you in mm. If the circumference of the cylinder is divided into n equal divisions, rotation of a cylinder through one division indicates 1/n rotation of the screw or 1/n mm axial advance.
In micrometer, the screw has a pitch of 0.5 mm and thimble has 50 divisions so that the least count of the micrometer is equal to 0.5/50 =mm. By reducing the pitch of the screw thread or by increasing the number of divisions on the thimble, the axial advance value per one circumferential division can be reduced and the accuracy of measurement can be increased.
How to use Micrometer?
The object is kept between the spindle face and the anvil face, and the ratchet is moved in a clockwise direction. This causes the anvil face and spindle face to fasten the object. When the object is securely tightened between the two, the ratchet makes a click noise indicating that the object is tightened and the measurement can be taken. The measurement can be read from the scale that is available on the sleeve.
Types of Micrometer
Based on the application, there are different types of Micrometers available. The following are the basic Micrometers:
- Inside Micrometer
- Outside Micrometer
- Depth Micrometer
Inside Micrometer
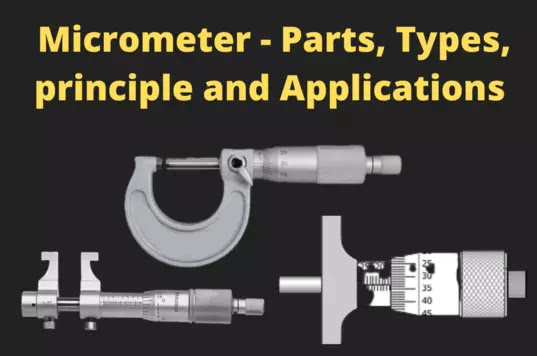
While the outside micrometer is used for measuring the outer diameter of an object, the inside micrometer is used to measure the inside, or inside diameter (ID). These look more like a pen, but with a thimble in the middle that turns. As the thimble turns, the micrometer expands like a curtain rod would. This then extends until each end of the tool is touching the inside of the pipe. When this happens, you use the numbering system on the thimble to find your measurement.
 |
| (Inside Micrometer) |
Outside Micrometer
This type of micrometer is designed for measuring the outside of objects—the outside diameter (OD). They look and move much like a C-clamp, which opens and closes by turning an internal screw. In a micrometer, the object you wish to measure is clamped between the anvil (the stationary end of the clamp) and the spindle (the moving part of the clamp). Once the object is secured in the clamp, you use the numbering system on the thimble (the handle portion) to find your measurement.
Depth Micrometer
While inside and outside micrometers are both used to measure the diameter of an object or hole, a depth micrometer is for measuring the depth of a hole, recess or slot. Depth micrometers have a base that aligns with the top of the recess that needs to be measured. The thimble is on a shaft that sticks up from the base. As the thimble turns, a measurement rod comes down from the shaft. You continue to turn until the rod hits the bottom surface of the hole being measured. When this happens you use the numbering system on the thimble to find your measurement.
Applications of Micrometer
A micrometer can be used to measure
- Depth
- Length
- Thickness of all the object that are placed between the anvil and spindle.
- It is commonly used in mechanical engineering and machining applications for measuring the length, width, depth, height.


